Saturday, May 30, 2009

Painted kitchen counter tops


You girls guessed right! I am working on my kitchen counter tops!

This has been the scariest but most rewarding project ever. See my boring island? It doesn't look like this anymore! It looks more like this....


So, what do you think? Doesn't it look wonderful? I love how it turned out. They will look much better once I paint the cabinets.

I sold a few of my creations and was able to do this project with that money. Yeah! Hopefully I can sell more things so I can buy materials to paint the cabinets! Cross fingers!

Really, I only spent about $30 to do this project. Thanks to coupons! That was the greatest part of it! I can't afford thousands even hundreds of dollars to change my counter tops so I decided I would paint them.

I came across this post and she totally inspired me to do it. That same day before I read the post, I went to Home Depot asking for advice on which paint to use, how to do it etc.. I really didn't know what to do. I was scared! So I came back home disappointed because no one really helped me. They had never heard such thing of painting counter tops, but I knew you could do it.

My prayers were answered when I came home and the first thing I see when I log in is that post. Its funny how things work out!

I just wanted to know what kind of paint to use and what kind of coat for protection. Sara from Whimsies & Whatnots did a splatter effect with the paint. It turned out beautiful. I did a different effect only using the faux painting sponge. Both ways look beautiful!

I used:

Faux painting sponge
Variety of acrylic paints (depends on colors you want)
Paper plates
Brush (if you want splatter effect)
Paper towels to clean your hands (might get kind of messy)


1. First thing I did was to clean the island counter top really good. I cleaned mine with warm water and soap.
2. Next, I needed to see all the colors. I was only going to choose 3 colors for the counter top. I did this by putting paint on a paper plate and writing the color name. Doing this will be much easier to decide on colors.


3. After you decide what colors to use, using the sponge I started to paint the counter top. I painted lightly and I had to make sure not too have to much paint. I first used Burnt Sienna and let it dry. Then on top I used Burnt Umber and let it dry. At the very end I painted antique gold to give it a final touch. There were some spots that came out too dark and you couldnt see the original color of the counter top. There is a solution! I mixed white paint with a light brick color and painted over the dark spots. Problem solved!

4. After its completely dry, (dries quick) comes the most nervous, terryfing step; Envirotex Lite. I was so nervous to do this step so my husband helped me. After we were done, I thought its really not that hard. You just need to make sure to read the directions carefully and follow them exactly. We used a foam brush to spread the varnish. We used a propane torch to get rid of bubbles, but Sara used lighters.

It does take time to paint and get the effect you want. Overall, its an easy project but takes a good couple of hours to complete. I promise if you try it, you will love results.

Here is my husband using the propane torch.


Make sure you tape off everything because it will be messy. Envirotex Lite is Hi Gloss you could even see the reflections. I accidentally poured a lot of varnish in this corner. Can you tell? ha ha.. For it to be the first time, I did good! :)


So $30 for this project is not bad at all! I am working on the rest of my counter tops today and hopefully I can finish them in a couple of days. Pictures coming soon!

Information:
I bought the Envirotex Lite at Hobby Lobby with a 40% coupon. They are originally about $30 a box of 32 oz. and I will be needing 3 more. So if you have the coupons use them! Each 32 oz box will cover 8 sq. ft.

I cant wait to see my kitchen completed!

Well thanks for stopping by and hopefully this will help. If you have any questions just send me an email!
Have a great Saturday!

Take a guess...

Hello everyone! I am working on a project and its turning out great! I can not show more pictures because it is not complete. But please, take a guess.... what am I working on?
Goodnight!

BEFORE


AFTER

Thursday, May 28, 2009

Show us where you live Friday- Baby Nurseries and Thrift Thursday

First of all I wanted to share this custom name frame I did. I absolutely love how it turned out! It matches Payton's bedding and it looks so cute!
Name Art on sale $18 + shipping
Contact me for more info! :)


Kelly over @ Kelly's Korner Blog is having a children's room and nurseries home tour!
As you know, we don't have any kids yet but hopefully we will soon.

A couple of months ago I found a wonderful website where they showed many different types of baby nurseries. I feel in love with all of them. You can see the post here of my favorite ones!
Enjoy!


Also..................


I am joining the fun at "Thrift Store Thursday" @ Homebody Hollys Party! This is the first time I've done this and I am very excited!

First, lets start by showing you pictures of my beautiful niece! Oh man.. I love her so much. She is so funny and is always laughing. She turned 9 months today! She has my eyelashes! ha..


So I went to Goodwill today and it went perfect! I found so many great items and the price was right.

I dont know for how long I've wanted a plant holder in shape of a bike.. I think they are adorable and look very nice by your front door. Well, today was my lucky day. I didn't only find one, but two! Mama bike, and baby bike! ha.. I paid $8 for both which is not bad. Good deal. They did need a little makeover.... sooooooooo.. with the help of my good ol' friend spray cans.. they turned from this.. into....


this!
I think they look much better. Im telling you blog friends, spray paint will do wonders! If there is an item you dont like anymore for whatever reason, spray paint the item and I promise you will never think the same about the item! It will be love at first sight all over again! :)

I also bought this cute hamper for $3. I might be painting it but I still dont know. Undecided!

I bought this little chair for my niece. It was only $1. I have big plans for this baby! Pictures coming soon!


I know, I might have bought a little too much but I couldnt help myself! The best is yet to come! I bought these four "not so pretty chairs" for $2.25 each. They will become "beauties" in a couple of days.

The recliner, I just bought it because it was $1. Really! Its ridiculous! I had no idea where I was going to put it but I liked it. It was clean, pretty and it was only $1.

It worked out great in my "reading area". It might be a little to big, but for now it looks good. Master bedroom moulding projects coming soon!

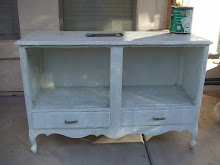
This is the best deal! Do you have an idea of what it is? Its a headboard! A cool looking headboard! You might be thinking why I have it in the kitchen, right? Well my plans are: turning this headboard into a wine cellar! Ok, that might have sounded to fancy!

I am planning to paint, remodel and embellish this headboard to hold wine bottles and wine glasses. Doesnt that sound interesting!?
Believe it or not, it was only $1.. I know.. ridiculous! We dont even drink wine but I have many wine decorations around the kitchen. It will go perfectly.

Well hope you have enjoyed my Thrifty Thursday finds.

Wednesday, May 27, 2009

Meat and Potato Lasagna Recipe

I tried this recipe today and it looks delicious! I have not tried it yet but I will soon. Just wanted to share it with you. You should check out the website! Its great.

Ingredients
6 large potatoes (about 3 lbs) ($.99) 10 lb potato bags are $2.97 this week!
3/4 lb ground beef ($.76) Bought a value pack that was marked down (LINK)
1/2 onion ($.20)
1 zucchini ($.79) Rolled back this week!
1 tsp garlic powder ($.03)
Salt/Pepper
1 15 oz can of diced or crushed tomatoes (or tomato sauce) ($.24) Used $1 off coupon
1 Tbsp brown sugar ($.03)
1/2 tsp salt
4 oz cheddar cheese, shredded (about 1 cup) ($1.10)
2 cups frozen corn ($.75 ) Did you know that March is "frozen food month"? Lots of frozen veggies on sale these days, so stock up!


Directions
1. Peel and thinly slice potatoes. Boil about 6-8 minutes until soft. Drain and pat dry.


2. In skillet, brown ground beef with chopped onion and diced zucchini. Add garlic powder, salt and pepper while browning. Drain.


3. In a medium bowl, combine diced tomatoes with brown sugar, salt and shredded cheese. Mix well. ( I did not have brown sugar so I added mushrooms!)


4. In 8x8 baking dish, layer sliced potatoes, meat mixture, potatoes, meat mixture, until all used up. Pour tomato/cheese sauce over the top. Bake at 350 for 20 minutes.


5. Prepare frozen corn as directed on the package.
6. Serve Meat and Potato Lasagna with side of corn!

Also this is a super yummy recipe and its so easy. Strawberries & Cream. All you need is strawberry's, "media crema" (found in hispanic food aisle) or whip cream and Splenda! Mix all together and enjoy!

Sunday, May 24, 2009

Monogram Storage Boxes

Remember this post about these inexpensive and cute boxes I made?
Also, these really cute magnets?

Well Megan and her sisters @ 4 sisters different hobbies decided to try these projects during a craft night they had. They turned out wonderful! The couldn't buy the same boxes I bought at Walmart, but they used shoe boxes instead! Creative! Great job girls! I love how the boxes and magnets turned out!


Here are the newest boxes I made using the same techniques but with larger boxes. The first box I made for a teacher I worked with, Mrs. Flanagan. She teaches half day kindergarten. She is a great teacher and she is so nice. I was so comfortable being around her it seemed I had known her for the longest time! Even though I have only known her for 2 weeks. I also made her a cute matching round magnet for her classroom. Hope she likes them!


This "S" box was a custom order for a baby's room. I love the way they turned out! I think they are perfect to hold small photo albums but really they can be used to hold anything. I will be making 3 more boxes to decorate my new shelf in my craft room!

If you have tried any of my projects, please let me know! I would love to post about it! Thanks!

Monday, May 18, 2009

Super Cute Project

Its busy around here. There is so much going on. This is the last week of school and I am actually sad. I am going to miss the kids. The students graduate this Wednesday! YAY! I am excited for them and the parents.

Well we had the team crisis from the District come to our class. It was nice having them. We did have a few students asking and mentioning about their teacher and they did well handling the situation. The teacher was diagnosed with Leukemia. She passed away Friday morning. I still can't believe it. I am still in shock. I will keep the family in my prayers.

One more week of school and I promise I will share more projects. Just a quick picture of our master bedroom bathroom makeover. What do you think about the color? Nice.. I love how they are turning out. Next weekend we will start painting and I really want to do something with the mirror. More pictures coming soon.


I am making some cute gifts for 2 of the teachers I work with and I want to share them with you. They are super easy and they turned out really cute.
I bought a plain frame, scrapbook paper and a frame mat.


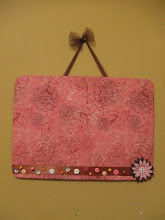
I painted the frame, glued the scrapbook paper on the mat and... here you go! It turned out so cute. I added a cute pink flower as a final touch.


So I will be making cute picture frames and a matching magnetic board. I will be making some more tomorrow and I will share with you. Right now, I am tired and I need some sleep. Good night! Enjoy.


Sunday, May 17, 2009

An Angel Watching Over Us

I dont think I have talked about my job lately. A little more than a month ago I got hired as a long term sub to work with students who are struggling with reading, writing and math. Well, two weeks ago they changed my schedule to work in a kindergarten classroom. I love working with kindergarten. The teacher had to leave for medical reasons. I never really talked to the teacher but I would say hi and bye kind of thing. Her class is the best! They are such good kids, they know the routines, the rules and are very respectful. Well sad news, very sad news. Yesterday, one of my friends informs me the teacher passed away in the morning. I just froze. I had goosebumps. I was sad. I cried. I didnt know what to think. It all happened in two weeks! How could this have happened? I am still in shock. She left 5 kids. I cant imagine what her family is going through right now. Its hard. Life changing.

This Wednesday will be the students graduation. I had planned to have one of the parents record everything and have the kids send a little love message for their teacher. I was even thinking making a huge banner. Now, it wont happen. I hope she knows her students love her and that her parents appreciate all she did. She was really a wonderful teacher. Last week, during centers, we did a banner that said "WE LOVE U". I did block letters and we had the students make their hand prints inside the letters. Then each student wrote their name on top of their hand print. It turned out really cute. She did get a chance to see what they did for her!

Tomorrow will be a different day.

Thursday, May 14, 2009

Round magnet board giveaway!

If you want to get a chance to win 1 of these beautiful round magnet boards, please visit:

www.solovelycreations.com

It is my new online shop! All you have to do is add yourself as a follower, leave a comment and link this giveaway! Many patterns to choose from!

Wednesday, May 13, 2009

Pom-Poms and a recipe!

Doesn't this look yummy! Its a new recipe I tried today that I found at $5 dollar dinners. Erin is great at keeping meals for up to 4 people for under $5. You should check her blog out! You can click on the recipe below and see for yourself how easy it is. Try it!


Have you ever tried to make these large pom-poms? I have and its fun! If you have a party coming up and need decoration ideas, you have to try these! They look beautiful! You could decide what size to make them.

Here is a picture of 4 pom-poms I made for Mother's Day Dinner. I did not have time to decorate for the dinner party I had for my mom and sister, but I had to have the pom-poms. They actually looked really cute! I found this great tutorial with pictures that shows you how to make them. They are very easy to make! You can also mix colors of tissue paper to give a colorful look to the pom-poms.

Pom-Poms


Here is one of the dishes I made. Everything turned out delicious. This is the first time I cook by myself for so many people. My mom is the one that always helps me, but this time I had to do it by myself. I cooked Shrimp & Garlic Pasta (it was delicious), Shrimp cocktail, Crab Salad and Crab Rice Cake. We had a great time and everyone loved the food! Hope you had a wonderful Mother's Day!