Thursday, April 15, 2010

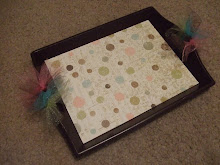
Bright and Fun Teacher Gift

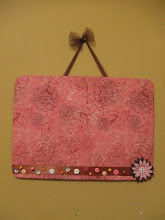
This is a custom order I did for a lady who is student teaching and wanted a cute bright sign for her mentor teacher. She said bright and really it doesnt get brigther than this! ha.. I think it turned out so cute! I used swarovski crystals on the flower rosettes and a touch of tulle!


I have them on sale for $25 plus shipping if anyone is interested. (Until April 18th, 2010) I can make them any colors! Visit my shop and check out other teacher gifts I've made.


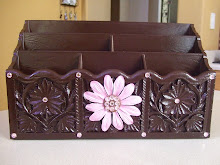
Here is a different style I have done for a teacher.

Monday, April 5, 2010

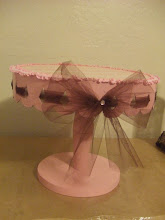
Charger Transformation - For the love of turquoise!

Good morning! Hope you had a great Easter Sunday! We sure did!
As you know, I'm in the process of adding more turquoise into my living room. I am challenging my self to decorate with things I all ready have. Today I share with you an easy project that makes a big change.
The power of spray paint is great! I love spray paint.
I've had this beautiful charger for over a year now. I bought it at Kirklands, one of my favorite stores. Its got to the point where its a little boring now. It needed a makeover! So it got one today!
First, I cleaned it well with a damp cloth.
Then, I spray painted a turquoise color. Spray light coats to get a better result.


Next, I watered down brown paint and used it as a glaze.
Wipe down paint after 10 seconds or so. Its a quick process.
After it dried, I used normal acrylic paint to bring out the 3-D embellishment.

This is the final result! I love it! Looks like a new charger! Its always a great idea to use things that you all ready have and give them new life! This project was free since I all ready had all the materials! Its looking great in my living room!
Thanks for visiting! Hope you enjoyed this easy tutorial!


Thursday, April 1, 2010

Super easy and cute flower headbands

I am in love with all the girly girl hair accesories! Love them! Especially flowers!
I started making these flower headbands for my niece and guess what? I fell in love with them and kept them! ha... Dont worry, I will be making more for her! This is a super easy project that anyone can do.
Materials needed:
Glue gun
Flower
Braided elastic
Tulle (optional)
Scissors
Felt

1. Separate your flower.

2. Cut 2 circles out of felt. (1 1/2in. diameter) Size of circle depends on size of flower.
Glue the first layer of flower on top of the felt circle.

3. Continue gluing the flower pieces together.
4. When finished gluing the flower, I added glue to the center of flower and used beads to decorate. You can also use swarovski crystals, ribbon, buttons etc...
5. I added hot pink and black tulle to the bottom of the flower.

6. Cut a piece of elastic (around 18 - 20 inches) I dont like it to tight thats why I cut the elastic a little longer.
7. Glue the ends of the elastic together. Using the 2nd piece of felt glue the elastic and the flower on top.
This is how the final project turned out!
I am loving the messy hair style! It looks so cute with the flowers! I'll be styling one of these tomorrow!
Hope you have enjoyed this easy tutorial! If you make any, I would love to see pictures!